How to Add Products
Learn how to manage your inventory by adding new products, setting categories, and defining units of measure.
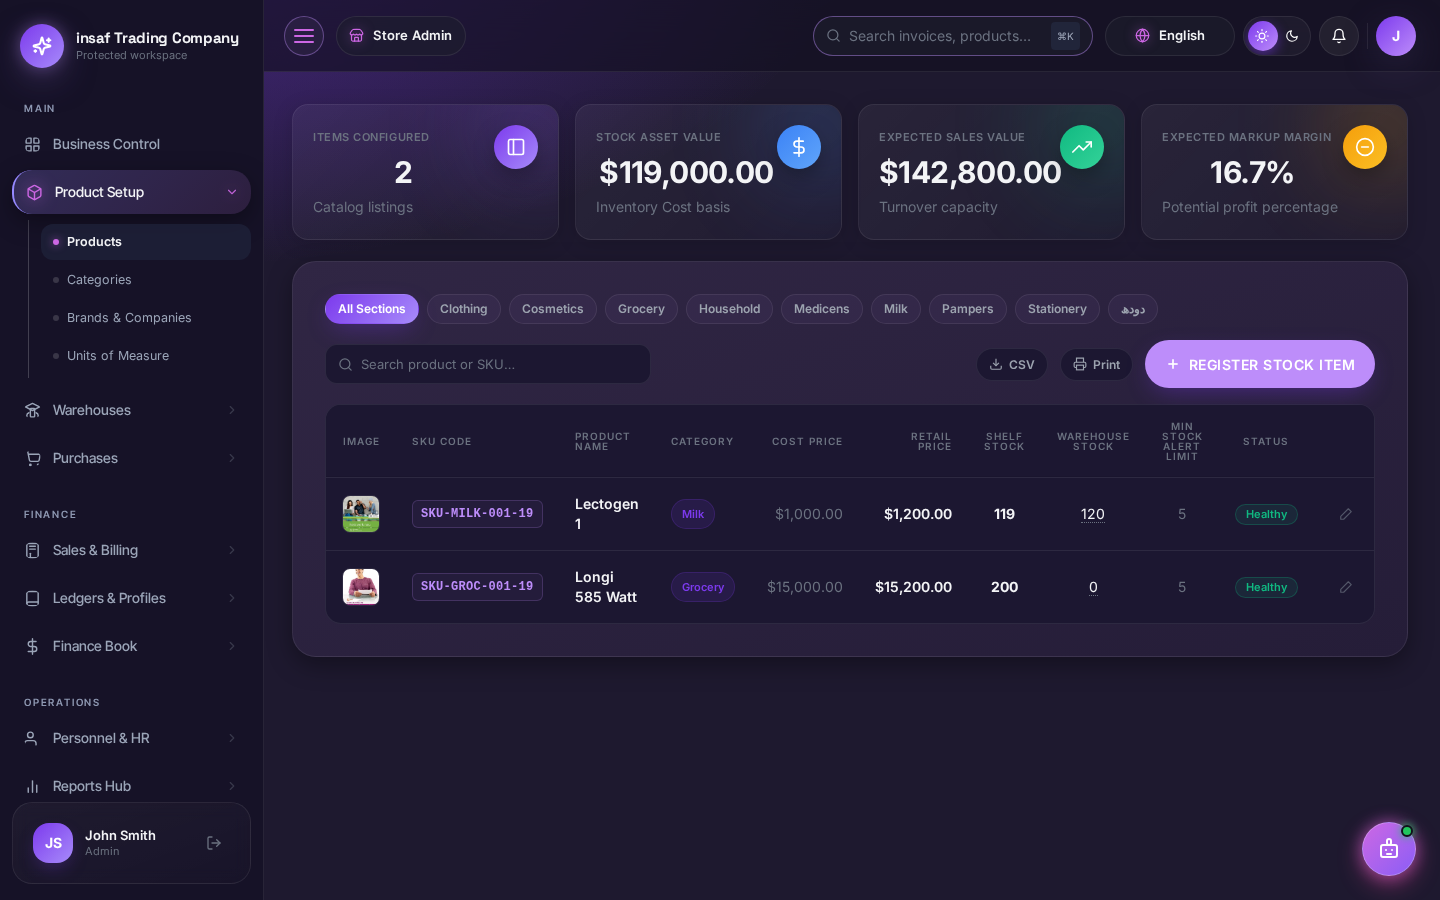
To begin managing your inventory, you need to add your products to the system. Navigate to Product Setup > Products and click on 'Add New'.
- Product Name: Enter the descriptive name of your item.
- Category & Brand: Organize products for better reporting and filtering.
- Units: Define how you sell (e.g., Pcs, Box, Kg).
- Pricing: Set your purchase price and default selling price.
Creating Sales Invoices
Step-by-step guide to generating professional invoices for your customers.
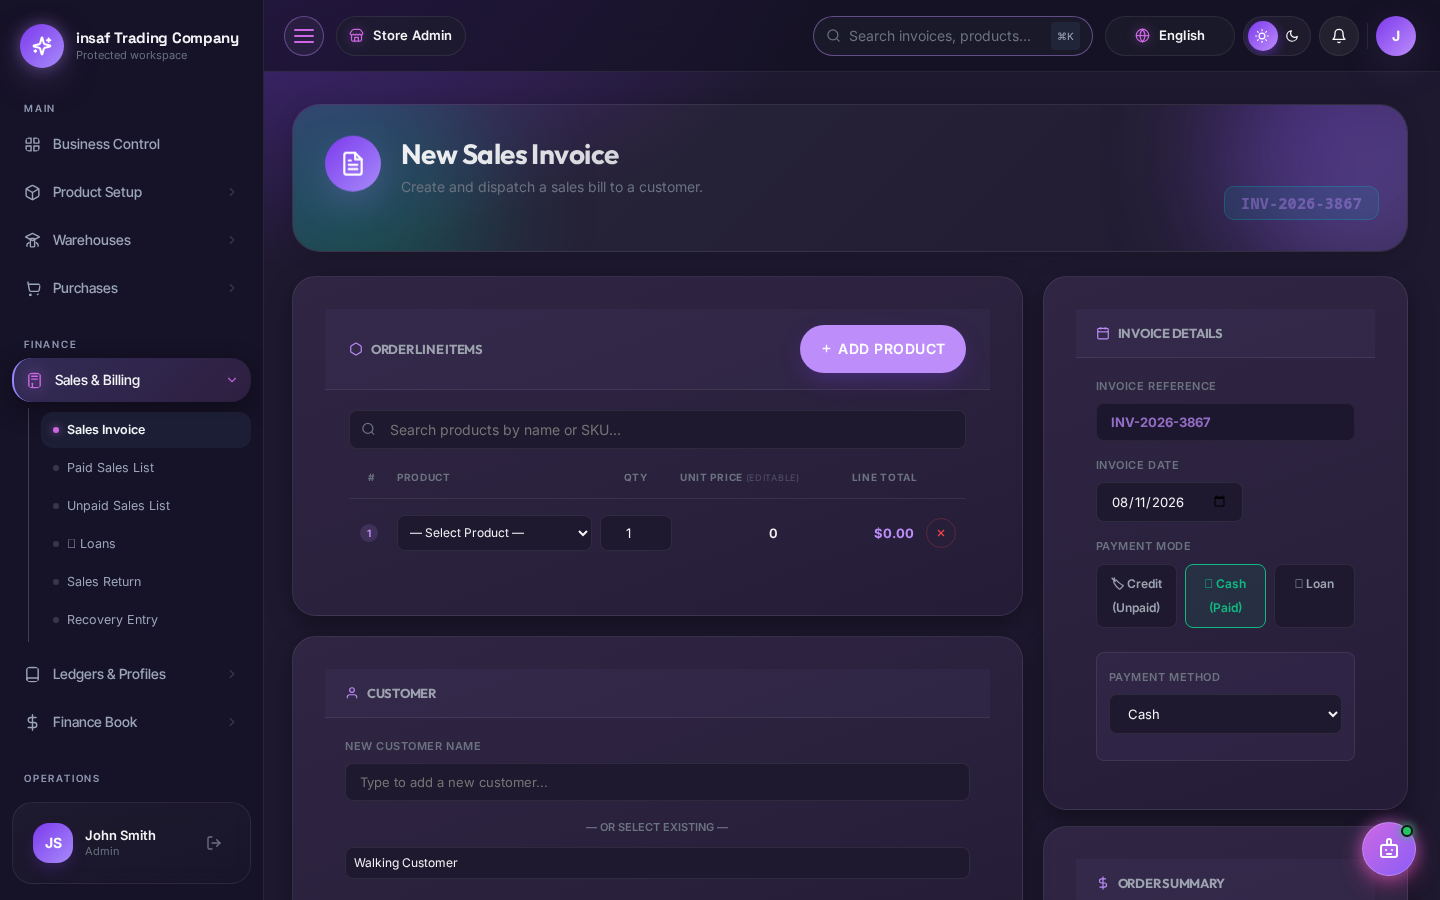
Sales invoices are the core of your revenue tracking. Go to Sales & Billing > Sales Invoice.
- Customer Selection: Select an existing customer or add a new one on the fly.
- Item Selection: Search for products by name or scan barcodes.
- Discounts & Taxes: Apply line-item or total invoice discounts.
- Payment: Mark as paid, partial, or credit.
Logging Purchase Entries
Manage your supply chain by logging purchases and updating stock levels automatically.
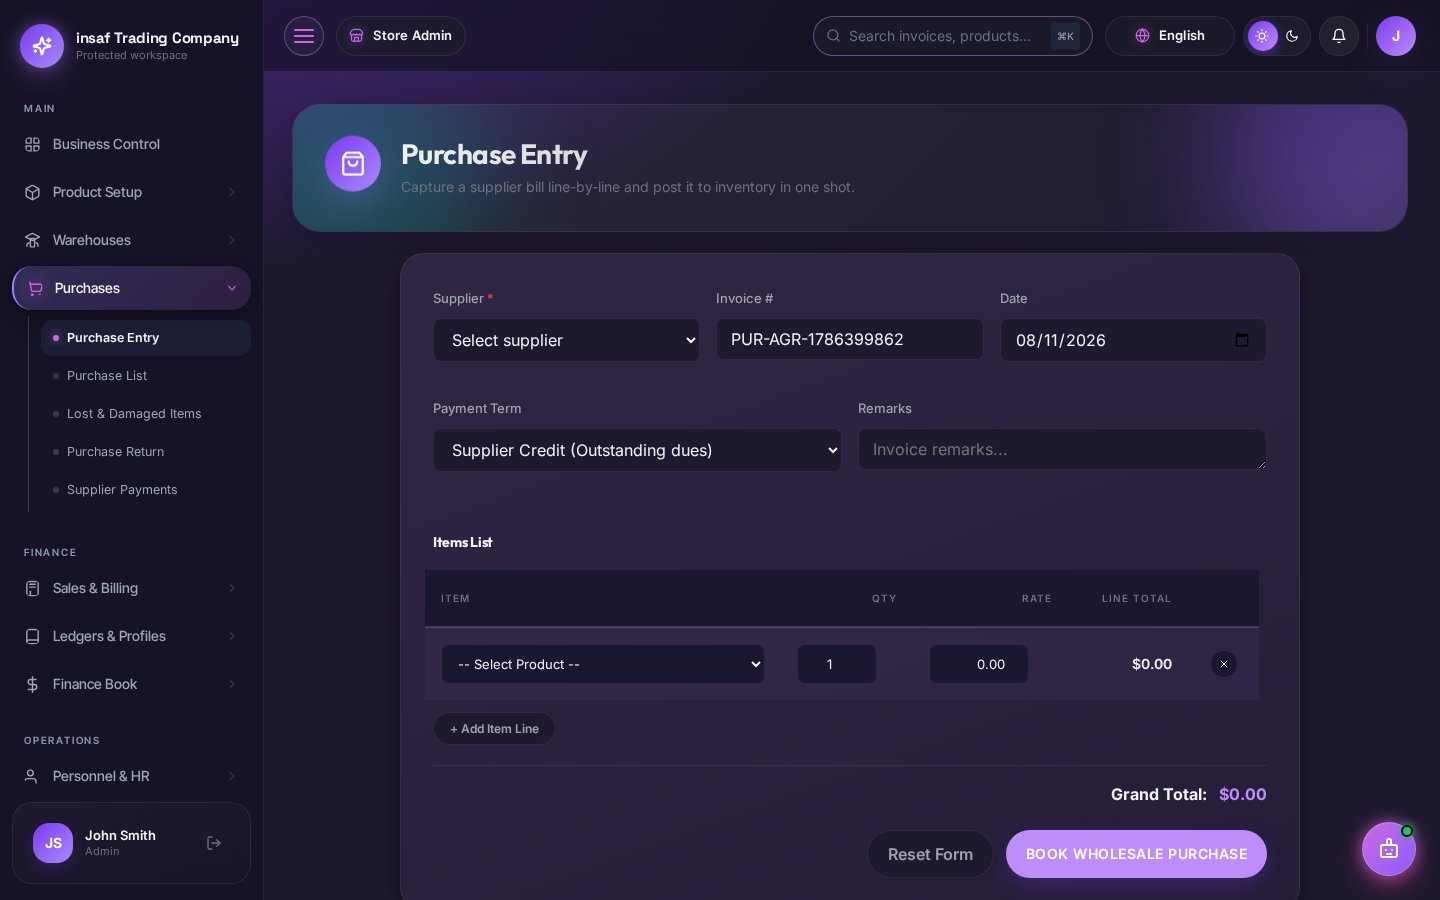
Keep your stock levels accurate by logging every purchase from suppliers. Navigate to Purchases > Purchase Entry.
Enter the supplier details, select the items received, and verify the purchase prices. The system will automatically update your inventory levels and supplier ledgers upon saving.
Managing Ledgers
Understand your financial position by tracking customer and supplier ledgers.
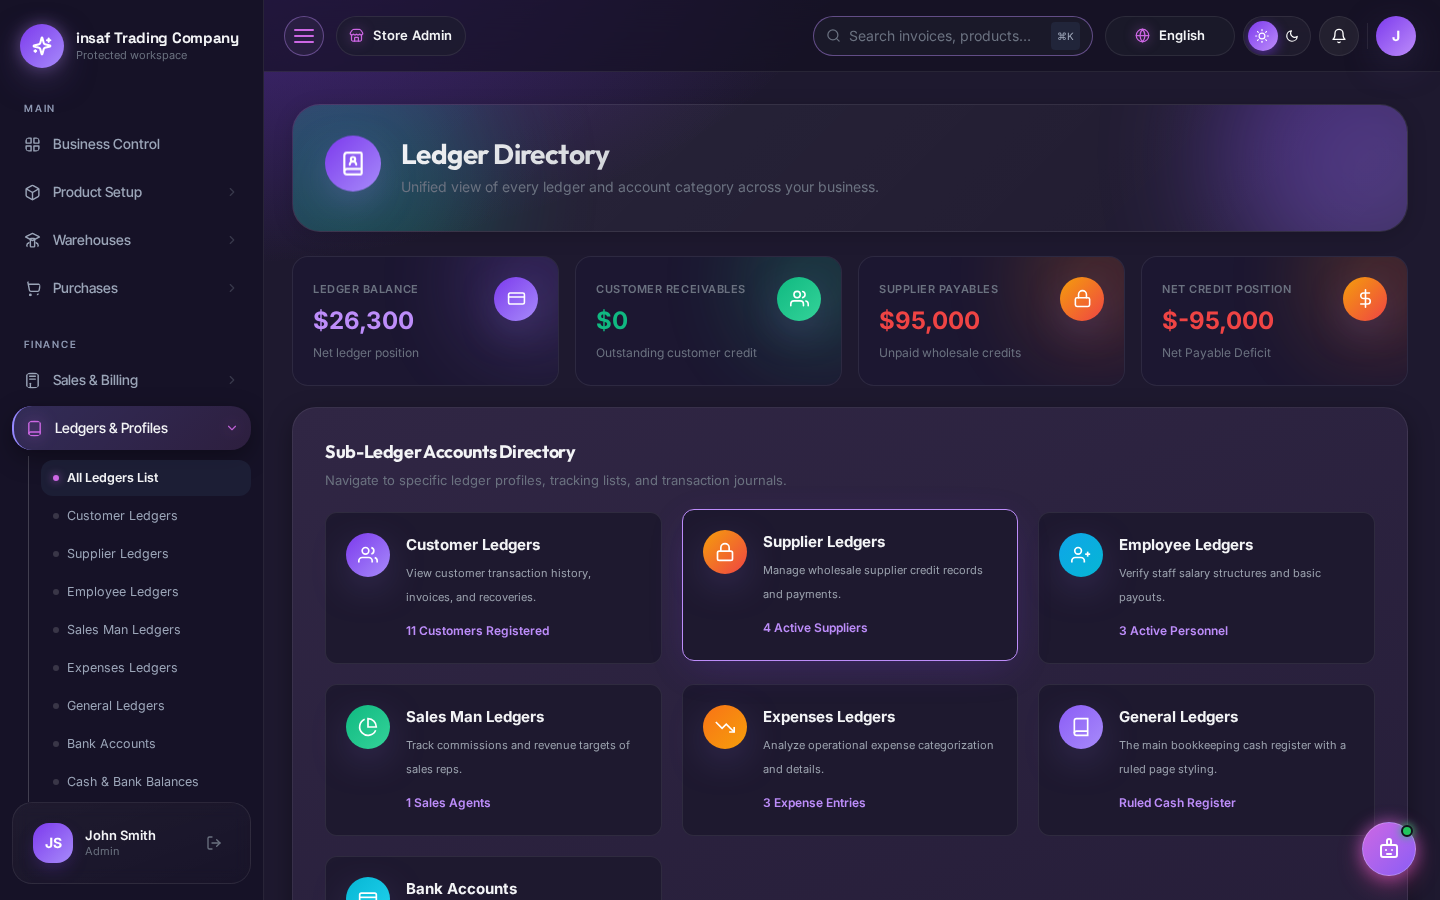
Maintain clear financial records with automated ledgers. Every transaction (Sales, Purchase, Payment, Recovery) is automatically posted to the respective ledger.
View Ledgers & Profiles > All Ledgers List to see a summary of all payables and receivables at a glance.